Pour-over coffee is one of the best ways to brew a flavorful cup, allowing you to enjoy the nuanced aromas and rich flavors of your coffee beans. This manual brewing method offers complete control over the water temperature, pour rate, and extraction time, giving you the ability to fine-tune every aspect of your brew. Whether you’re a seasoned coffee enthusiast or just starting, mastering the pour-over technique will significantly enhance your coffee experience.
In this guide, we’ll walk you through the step-by-step process to brew the perfect pour-over coffee, discuss essential equipment, and offer tips for achieving a consistent and flavorful cup every time.
What is Pour-Over Coffee?
Pour-over coffee involves manually pouring hot water over coffee grounds in a filter. The water passes through the grounds and extracts the flavors, which then drip into a carafe or coffee mug. This method is favored for its ability to control every part of the brewing process, allowing for maximum flavor extraction and a clean, crisp cup.
While pour-over coffee requires a bit more attention than an automatic drip brew, it’s well worth the effort for the control it provides over your coffee’s flavor profile.
What You Need for the Perfect Pour-Over
To get started with pour-over coffee, you’ll need some essential equipment:
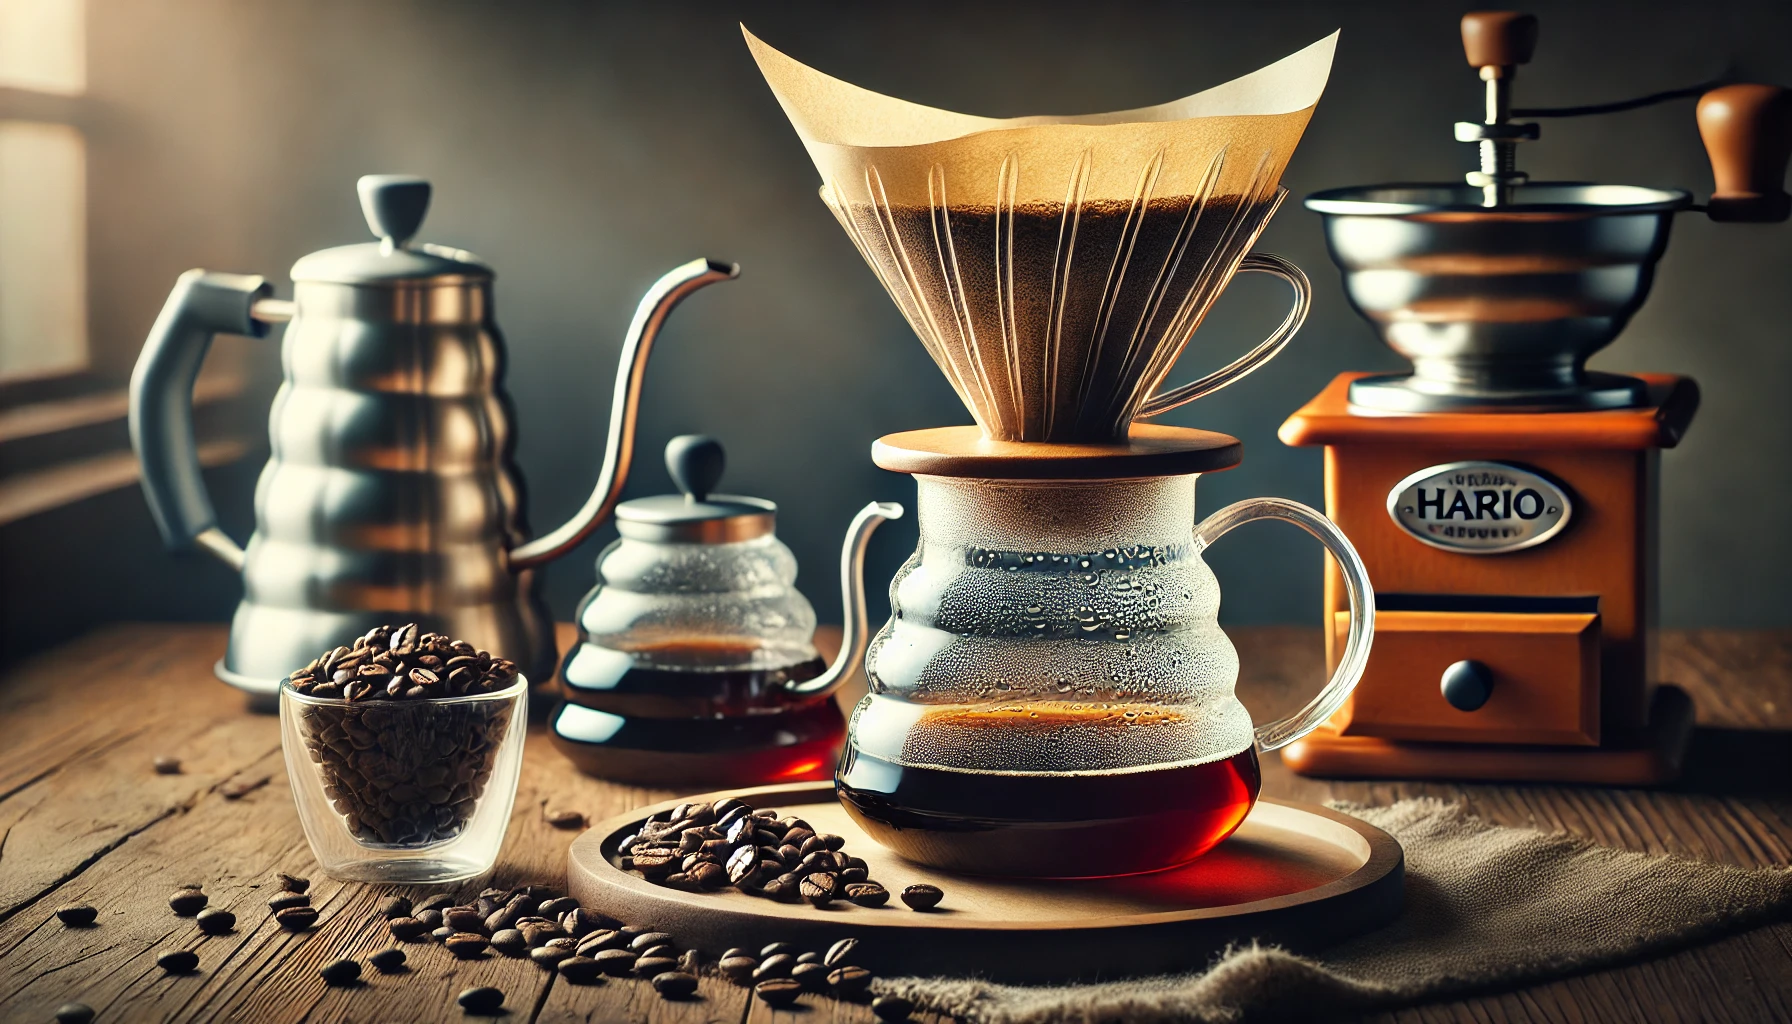
Essential Equipment
✔ Pour-Over Dripper – The most popular options are Hario V60, Chemex, and Kalita Wave. Each dripper has unique features, but all produce great coffee.
✔ Coffee Filter – Paper filters are common for pour-over brewing, but cloth filters are also an option for reusable brewing.
✔ Gooseneck Kettle – A gooseneck kettle gives you precise control over your pour, which is essential for an even extraction.
✔ Burr Grinder – Freshly ground coffee is key to a flavorful cup. Use a burr grinder to ensure a consistent grind size.
✔ Scale – To measure your coffee and water for consistency.
✔ Timer – To ensure precise brewing time for the perfect cup.
Ingredients
✔ Freshly Roasted Coffee Beans – Choose a coffee that is medium or light roast to fully appreciate the nuances of pour-over brewing.
✔ Filtered Water – Clean water is crucial for extracting the best flavors.
Step-by-Step Guide to Pour-Over Coffee
Step 1: Prepare the Equipment
- Place the pour-over dripper on top of your mug or carafe.
- Insert the coffee filter inside the dripper, ensuring it fits snugly.
- Rinse the filter with hot water to eliminate paper taste and preheat the dripper and carafe. Discard the rinse water.
Step 2: Measure the Coffee and Grind It
- Measure out your coffee beans – A standard ratio is 1:16 (1 gram of coffee to 16 grams of water). For one cup of coffee (about 8 oz), use 15-18 grams of coffee.
- Grind the coffee to a medium grind size, similar to table salt. A burr grinder is recommended for consistent particle size.
Step 3: Heat the Water
- Heat your water to 195–205°F (90–96°C). Too hot water can lead to over-extraction, while too cool water will under-extract, leaving your coffee flat.
- Measure the water based on the coffee-to-water ratio. For 15g of coffee, use about 240ml of water.
Step 4: The Bloom Phase
- Add the ground coffee to the filter.
- Pour a small amount of hot water (about twice the weight of the coffee) in a circular motion, just enough to saturate the grounds. This is known as the bloom phase, which helps release carbon dioxide and improve extraction.
- Wait for 30 seconds to let the coffee bloom.
Step 5: The Main Pour
- Pour the rest of the water slowly in a circular motion, starting from the center and moving outward. Try to keep the water level consistent as you pour.
- Pour gently and steadily to ensure an even extraction. Try to pour in small increments over 2–3 minutes, depending on the total amount of water.
✔ Pro Tip: Keep the water level just below the filter’s edge to avoid overfilling.
Step 6: Let the Coffee Drip
- Allow the coffee to drip through the filter naturally. This should take about 3–4 minutes for a standard pour-over.
- Avoid stirring the coffee or rushing the process.
Tips for Brewing the Perfect Pour-Over Coffee
✔ Consistent Grind Size – Uneven grinds can lead to under or over-extraction. Invest in a good burr grinder for better control.
✔ Water Temperature – Use a thermometer to ensure your water is within the ideal range of 195–205°F.
✔ Pouring Technique – Pour water in small, circular motions to evenly saturate all the grounds.
✔ Use a Scale – Measure your coffee and water to achieve the correct coffee-to-water ratio consistently.
✔ Don’t Rush the Process – Take your time with the pouring and brewing steps. Quality coffee comes from patience.
Common Mistakes to Avoid
🚫 Using Boiling Water – Water that’s too hot can scorch the coffee, making it bitter.
🚫 Uneven Grinding – An inconsistent grind can result in uneven extraction, leading to sour or bitter flavors.
🚫 Pouring Too Fast – Fast pours lead to under-extraction and weak coffee.
🚫 Not Letting the Coffee Bloom – Skipping the bloom phase will affect the coffee’s flavor profile.
Enhancing Your Pour-Over Coffee Experience
Experiment with Different Coffee Origins
The beauty of pour-over brewing is its ability to highlight the unique flavors of different coffee beans. Experiment with single-origin coffees from regions like Ethiopia, Colombia, or Guatemala to discover new tastes.
Add Flavorings for a Twist
For an extra touch of flavor, you can add a small dash of cinnamon, vanilla, or cocoa powder to the coffee grounds before brewing.
Conclusion: Pour-Over Perfection at Home
Pour-over coffee gives you complete control over the brewing process, resulting in a clean, flavorful, and aromatic cup. By following the steps and using the right equipment, you can brew a café-quality cup of coffee right in your own kitchen.
What’s your favorite pour-over brewing method? Whether you prefer the Hario V60, Chemex, or Kalita Wave, mastering pour-over brewing will elevate your coffee game to the next level.